

This week we'll proceed with the final steps of the method to learn about the sonic impact of the main parameters of a compressor. After having seen the attack and release times, now it's the turn of the ratio and the threshold.
In the last installment, we suggested that you set your compressor in the following way in order to follow along with the explanations in this article: Attack set to whatever you want, release to the minimum, ratio to the max, and the threshold set low enough so that the signal triggers the compressor in a flagrant way.
Ratio gaga
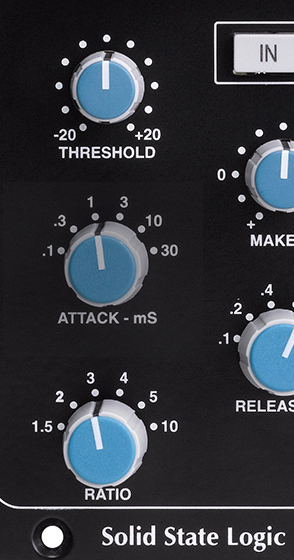
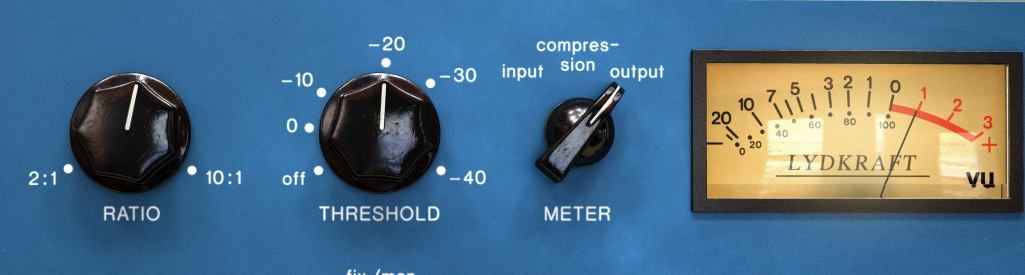
Let’s start with the ratio. Setting the ratio is often a compromise between controlling the signal and keeping the sound “aesthetically” pleasing. The higher the ratio is, the “tighter” and more controlled your signal will sound, but also the “smaller” it will sound, because it will be more heavily compressed. Conversely, a low ratio makes the track sound “bigger, ” to the detriment of dynamic control and the sense of “tightness.” So, what do you learn from this? That you should think of this setting in terms of “bigness” versus “tightness.”
For the time being, since the ratio is at the maximum in our example setting, the sound will be hyper-compressed. Try to reduce it without lessening the impact and groove you had achieved with the attack and release times. When you reach that point where the effect you had painstakingly achieved disappears, increase the ratio a bit and you should find the best compromise.
Let’s move on now to the threshold. Right now, the setting you have is obviously exaggerated. Considering the work you did previously, it should be easy enough for you to achieve the desired effect by increasing the threshold gradually.
Do note, however, that to achieve a more “organic” sound, it is recommended to set the threshold so that the compressor isn’t active all the time. In fact, this way the signal will have more dynamic contrast, which is often associated with a “lively” sound. Also notice that if the compressor permanently indicates a given amount of gain reduction ─ say, for instance, it never exceeds –4 dB ─ you are dealing with so-called “static compression, ” which means it isn’t really compressing. In fact, that would be the same as attenuating the entire signal 4dB, which isn’t very interesting. I have oversimplified things a bit, though, because the reality is much more complicated, but I hope you get the idea. That said, if the result achieves what you wanted, despite the static compression, to hell with what I just wrote! What’s important is that you bring to life that sound you have in your head.
To finish, just a brief remark regarding make-up gain, which is the parameter that allows you to compensate for gain loss at the output due to compression. My advice to you is not to go at it like a madman. Do not follow blindly the principle that states that you should increase the signal +XdB when the gain reduction indicates a maximum value of -XdB. It doesn’t really work like that in real life. Trust your ears and increase the volume so that the overall loudness of the audiol with compression is pretty much the same as it was without. This way, the compressor will better reflect the work you have made in the previous stages, from the rough mix to EQing.