

As I mentioned in the last article, the ideal home studio must have good room acoustics and soundproofing. But, what does these two concepts mean? To answer this question we need to dive into some theory.
The place you choose for your home studio (if you have the chance to actually choose it), is often a compromise closer to the “least bad” option than to the ideal room with all necessary acoustic and soundproofing conditions. So the goal is usually to make everything you can to improve the situation according to your budget, which rarely exceeds four figures.
Before we get to the practical solutions, we need to recall several physical concepts so you can understand better soundproofing and acoustics. But don’t worry, I know you are more interested in music than in physics, so I’ll spare you from complex details. In this regard, I ask acoustic experts to bear with me and allow me to take some shortcuts and not be as comprehensive as I could be.
What is sound?
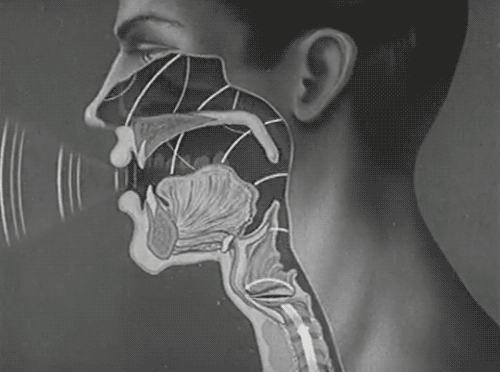
Open your mouth and say “Aaahhh” (don’t be scared). What has actually happened there? Well, your brain sent a series of electrical messages to make your lungs and throat push air through the vocal cords (aka vocal folds). The vocal cords are very fine membranes that vibrate according to the pressure exerted by the air, like a cloth does with wind. This movement is then propagated from the throat to the surroundings, making the neighboring molecules collide into each other.
That obviously applies to the air inside your mouth and beyond, but also your cheeks, teeth, jaw, and all other objects encountered by the wave you just created… all the way to your dentist’s ears.
Once they reach the latter, the eardrum (yet another membrane) is set into motion, allowing the auditory system to transform the wave you created into an electrical message that your dentist’s brain can understand. He then activates the drill and it all starts again: The the rotary movement of the drill generates a wave that is propagated until it reaches your ears.
So, sound is a wave, a phenomenon that makes molecules vibrate at a given frequency and with a given amplitude.
The frequency is the speed at which the molecules move about, measured in Hertz. The higher the frequency, the faster the molecules move and the higher-pitched the sound.
The amplitude is the extent to which they move, measured in Decibels. The higher the amplitude, the louder the sound.
The behavior of waves
So, sound is a wave. Sound waves propagate in every means they find, they are partially reflected on whatever they bump into and are attenuated until they die out (the amplitude decreases), like any other wave: a radio wave, a sismic wave, a light wave, etc.
It is thanks to this propagation phenomenon that you can hear the horn of a car that’s 60 ft away or the drilling machine of you neighbor in the penthouse when you are in the first floor.
And it’s thanks to reflection that your voice sounds so good when you are singing under the shower or that your name is bounced back when you yell it at a mountain.
And attenuation is what makes your bathroom stop echoing your voice once you’ve stopped singing and are getting ready to walk the dog.
These three phenomena are very closely related because there wouldn’t be any propagation without reflection nor attenuation. When the sound wave hits an object, part of its energy is absorbed by the latter, another part is reflected and yet another part penetrates it. And that’s how sound gets gradually attenuated. Look at the following diagram:

Notice how the original wave, in green, behaves when encountering a wall: it rebounds on the wall (yellow) but, at the same time, some of its energy is absorbed by the wall and some of it penetrates it. Thus, a wave produces lots of secondary waves every time it bumps into an object. And when I say “lots” I do mean lots. Here you can see the waves reflected from a building modeled with the Odeon software:

A nice mess, isn’t it? And even more so if you consider that this diagram is 2D, while the sound waves actually propagate in a three-dimensional space.
But it really starts getting complicated when each wave starts colliding with other waves and, thus, affects these other waves on its way! Because they interact with each other summing and canceling themselves, partially or completely.
Look, for instance, at what happens when two waves (green and red) with the same frequency but traveling in opposite directions bump into each other. You get a so-called stationary wave (blue) whose amplitude is higher than that of the two previous waves.

My idea here is not to try to explain to you how sound waves work. But the basics we’ve just seen are important for what really interests us, if you consider that every single object in your home studio will interact with the sound in it. Especially the floor, walls and ceiling will have a big impact on the sound waves and how they behave and interact with each other.
The shape and materials of a room and the objects in it determine how sound is propagated, reflected and attenuated. That’s why clapping your hands in your bedroom, bathroom or living room doesn’t sound the same.
Room acoustics
This influence of a room on sound is what we call acoustics. Think of it as its sound signature:
- Depending on the interaction between the waves and the surfaces of the room, the latter might highlight or attenuate certain frequencies. This is called frequency response.
- In some rooms, sound might resound far longer than in others. This is called reverberation.
In practice, reverberation is made up of the myriads of reflections of sound that make their way back into your ears and which you saw in the image above. It can be more or less intense, as you can easily verify by singing in your bedroom and then in your bathroom. In the first case, there shouldn’t be too much reverb (considering the soft and dampening materials you probably have in it, like the mattress, bedlinen, pillows, drapes, carpet, rugs, etc., which significantly attenuate sound and limit reflections), while in the second there will be lots of it (taking into account the hard surfaces in the bathroom, like the bathtub, washbasin, tiles, and mirrors, which favor reflections and don’t do much in terms of attenuation).
That said, it’s important to know that the acoustics of your home studio are a crucial element that can have a big impact on the quality of the productions coming out of your studio, since they will not only affect the sounds you record or mix, but also the sounds you hear. How can you make the right decisions for a mix when your room is playing tricks on you? Imagine a painter whose atelier is in constant twilight: his perception of colors and lights will be marred by the lack of lighting.
And if you think modern technologies solve the problem you might be in for an ugly surprise: When a recording is veiled with an unpleasant reverb due to the acoustics of the room where it was tracked, you will have to use one of those plug-ins that try to diminish the effect (some of them with more success than others, even if only partially). But more often than not, the best decision from a qualitative point of view would be to re-record the take. It’s like using Autotune or Melodyne: Yes, you can alter even the voice of someone like Justin Bieber in a somewhat unnatural way, but to get more musical and nicer results, you should get someone who can actually sing in tune.
The perfect room
So, whatever the environment you’ve chosen for your home studio, you need to do all you can to make sure that it has the best acoustics possible. And in this case “the best” means that it should sound as neutral and homogeneous as possible in terms of frequency response (avoiding any frequencies from being highlighted), and have a reasonable reverb time: you don’t want to feel like in a anechoic chamber (without any reverb) because it would sound unnatural, but you also don’t want to sit inside a cathedral where everything is a jumble. An RT60 of around 0.5 seconds is ideal.
To achieve that you will probably need to add some sort of acoustic treatment in the form of panels of different materials, but you should also consider the shape of your studio. Many acousticians have tried to define the ideal proportions a room must have for it to provide the best possible results in terms of sound. Many long and heated discussions later nobody seems to agree on what the perfect room should be like. Sepmeyer, for instance, advocates for a ratio of 1: 1.6 : 2.33 between height, length and width, which means a room with a 7'10.5" ceiling should be 12'7" wide and 18'4" long. A very nice room, isn’t it?
The problem with this formula is that, apart from those who already have a room with these exact proportions (which is basically no one…), it’s useless for those who can’t to do any major construction work, be it because they are only renting the place or because, after having vigorously defended the advantages of a home studio over their partner’s dressing room, they now have to make the bedroom 3ft shorter to fit it in.
So don’t get obsessed with the perfect room. And rather than reading the recommendations of expert acousticians about what you should do to make it happen, you should start thinking about what you actually need to avoid to not have major acoustic problems, which will surely be much more affordable although not necessarily a walk in the park.
And what you need to avoid is:
-
Dimensions of the walls being exact multiples of each other (x1, x1.5, x2, etc.): The room should not be twice as long as it is wide, for example, nor should it be a square…and certainly not a cube! The cube in terms of acoustical architecture is the worst there is – the antichrist –, to the point that if your home studio is cubical, you should definitely make a wall shorter…or start thinking of that dressing room for your partner.
-
Parallel walls, since they favor the so-called flutter echo (the metallic ringing you can usually hear when you clap your hands in an empty garage).
-
Straight or acute angles, because sound waves tend to concentrate there; open angles favor dispersion.
It all depends on your expectations. In the next article we’ll see how to go about to accomplish what you want. However, before we move one, there’s still the issue of soundproofing left.
Soundproofing
To avoid problems with the neighbors like the ones we mentioned earlier, as well as to prevent your work from being affected by external noises, your home studio ought to be as soundproof as possible. This basically entails two things: stopping sounds generated in your studio from leaving it and, at the same time, stopping external sounds entering your studio. However, before we discuss how to do that, I think it’s important to deal with another detail.
Since we generally hear sound traveling in air, we often forget that sound propagates better through most liquids and solids because they are denser (the molecules of such materials are closer together and, thus, the sound wave can be transported more easily). Sound travels at a speed of 1,126 ft/s (340 m/s) in air, whereas in the same time it travels 4,859 ft (1.48 km) in water, 7,874 ft (2.4 km) in rigid PVC, 10,170 ft (3.1 km) in concrete, 17,388 ft (5.3 km) in glass, and up to 19,357 ft (5.9 km) in steel. Do note that all these speeds are indicative and depend on the characteristics of the material itself, as well as on the weather conditions: pressure, temperature, humidity.

And that’s really the biggest issue. Because most people can’t even start to imagine that the thick and solid walls protecting them from the rain and cold are their worst enemies when it comes to soundproofing. The fact that they conceal everything you do from your neighbors’ sight creates the false illusion of isolation anybody who’s gone camping knows only too well, just like little kids think nobody can see them when they put their hands over their eyes. Closing your tent doesn’t mean you are alone nor does it mean you can complain louder of the jerk who parked his trailer next to your tent and whose tennis ball landed on your site while you were peacefully reading about the art of mixing.
There’s obviously a big difference between a wall and a tent, and the way the walls are built plays a big role, but what’s important here is to always bear in mind that sound doesn’t only travel through air, but also through solid materials (i.e. structure-borne sound). Because that’s what will concern more your neighbors and roommates, and that’s why we’ll talk about it in more detail in the next article dedicated to soundproofing.