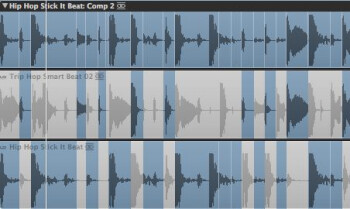
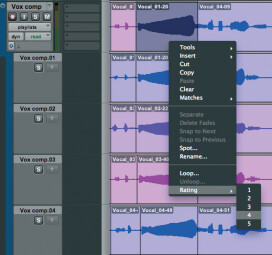
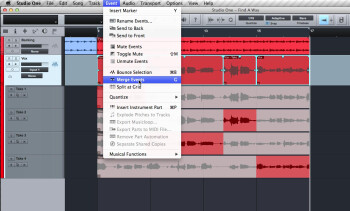
Comping is an audio editing technique that consists in putting together different takes of the same instrument in order to get the "perfect recording" without the trick being audible.
Before the advent of digital technologies, this operation was cumbersome and demanded a lot of know-how. Fortunately for you, computer music offers now an amazing flexibility that makes it all much more simple when you know the basics of how it’s done.
Pre-requisites
Before getting into the heart of the matter, let’s go over the things you will need.
To begin with, in order to be able to comp(ile) something you need enough material to put together. You should have at least four takes. Be sure to record enough material when the musicians are in the studio, but take care not to burn them out or you might end up with substandard performances.
On the other hand, for the comping to be as transparent as possible there must be some consistency between takes. Not only in terms of rhythm but also of timbre. So refrain from changing the settings of the amp, the position of the mic, etc. This is especially important when it comes to vocals. In this particular case, we highly recommend you to use takes from the same session only, since the timbre of a voice can change from one day to another.
Finally, to improve your efficiency, it is useful to know your DAW’s keyboard shortcuts like the palm of your hand, especially those to zoom, navigate within the project, change tools (scissors, glue, select), and obviously to undo something (Ctrl+Z or Cmd+Z, unless you come from another galaxy!).
The basics
Now that you have everything you need at hand, let’s move on to more serious things. We will not address the different comping options of any particular sequencer, refer to the manual if that’s what you are looking for. At this stage we will assume that, one way or another, the different takes of your instrument are already perfectly in sync on top of each other.
The first thing you ought to do is split these takes into several musical phrases. The split points are crucial in order to avoid artifacts, so you should try to split the takes during silent passages. Make sure you deactivate the snap to grid option of your sequencer so that the point where you split is the exact place where the cursor is at.
You then have to choose the best parts to put them together. And, finally, you have to apply a crossfade of at least two milliseconds between every part, which ought to avoid any audible clicks.
Child’s play, isn’t it? The only problem is that it is not always as easy as that. Sometimes the editing can only be done right in the middle of a waveform, which can be heard miles away…but don’t despair we still have some other tricks up our sleeve!
Going further
First of all, you should know that a recording has many more silent zones than we believe it does. We can find “microsilences” before certain consonants, for example, or during a brief damping of the guitar strings, etc. Play with the horizontal zoom in order to spot them. If you can stick a min-crossfade in there, go for it!
On the other hand, noise is your friend. Whether it’s a breath, the buzz of a guitar amp or noise from your preamp, your edit will go unnoticed.
In case it’s a mono instrument, it is even possible to sometimes cut right in the middle of the waveform. In which case you need to match the waveform amplitude of both files and then align them so that there is no abrupt disruption of the curve. Add to that a linear crossfade spanning over two or three cycles of the sine wave and you should end up with something coherent.
For a polyphonic instrument, a long crossfade of around 40 milliseconds on the sustain of a note will generate a phasing effect, but if the instrument isn’t the most upfront, it should do the trick. Don’t hesitate to try out the different types of crossfades (linear, logarithmic, etc.) in order to achieve the most natural-sounding result.
And finally, in the most desperate cases, you still have a pretty unknown weapon: pre-masking. This psychoacoustic effect will trick the listener’s brain to your advantage. The way it works is that every sound immediately preceding a violent transient is more or less masked. That means drums will be your best ally because you will be able to potentially do an edit right before any bass drum or snare hit and any other track. But be careful, it isn’t black magic, so it may not work. You should test its effectiveness on a case-by-case basis.
There you go. We hope these tips help you improve your productions. Although comping is not the most exciting thing to do, it’s really worth the effort and makes the difference between the pros and the amateurs. One last thing before you can return to your mixes: once you are done with the comping, let your ears rest five minutes and then listen again to the result two or three times by itself and within the context of the song to make sure that the editing is imperceptible.


