

Some musicians and producers do a lot of their mixing while they’re tracking, whereas others set everything back to zero at the end of tracking, and start their mix from scratch.
Whether you’re in the former or latter category, there will be a point in your project when you’ve finished all tracking, and turn your attention exclusively to the mix. When you get there, take a little time out to make sure your tracks are organized and you’ll find your mix workflow will be more efficient, allowing you to concentrate more on the artistic aspects. The additional step of going through your tracks individually and removing any glitches like clicks and bad edits, will help your tracks to sound as good as possible.
Organize Your Tracks
First, take a look at the track names in your DAW mixer, and make sure each one clearly describes its track. Track labels in DAW mixers typically can display only a certain amount of characters, so if your track names are too long, they’ll get truncated and become unreadable. Change whatever track names are unclear or unreadable. If you have to stop and figure out what’s on a particular track when you’re mixing, it will only slow you down.
 An unorganized mixer screen. Notice some track names are unreadable because they were truncated.
|
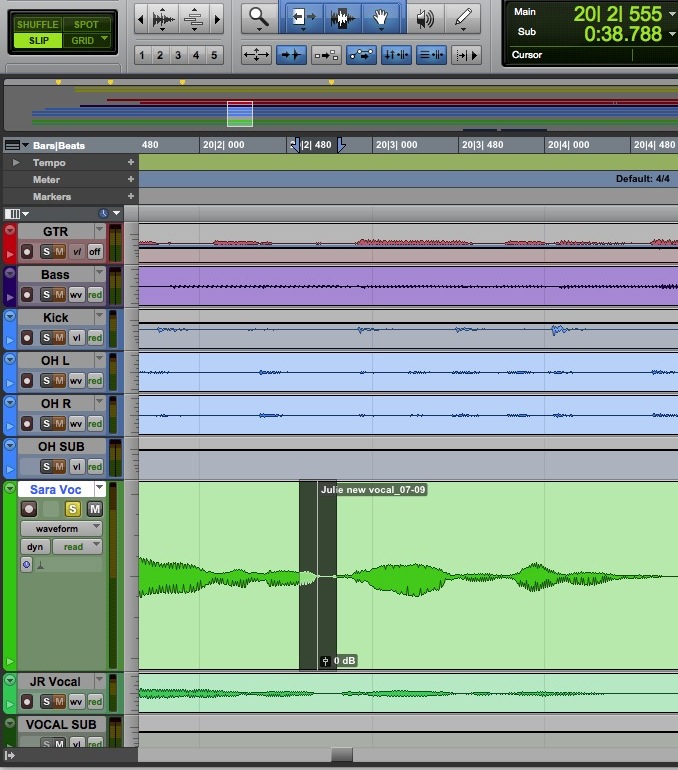
Next, organize your tracks by instrument type. Put the guitars together, the keyboards, the drums, vocals and so forth. That way, you’ll be able to more efficiently find what you’re looking for and see related tracks next to each other, which can be helpful from a level-balancing standpoint. For instance, it’s a lot easier to visually assess the relative balance of the drums if you can see all the drum tracks next to each other in your mixer.
Think about where you want to place each track within the mixer, and also about internal order within each track type. For instance, you might put the kick drum on the far left of the drum tracks, with the bass guitar to its left, so kick and bass, whose relative levels are so important, are right next to each other.
Color Code for Fast Recognition
 A mixer screen with tracks organized and color-coded by instrument type, and renamed where necessary for legibility. Notice that kick and bass are placed next to each other.
|
Next, give each track type a different color. There are no standards for this, do whatever works for you. You could make drums blue, bass purple, guitars red, vocals green, and the master track and auxes black. Why? Again, it’s a visual-recognition thing. Once you get used to your track-color system, you’ll know at a glance, without even having to read the track name what type of track you’re looking at, and that can speed up your workflow.
Check for Glitches
 Go through each track soloed and listen for glitches. Add crossfades to edits that are causing clicks.
|
It’s also a good idea to solo each track, and listen to it from beginning to end, to make sure there are no pops, glitches, clicks from edits without crossfades, cut-off notes and other such gremlins lurking, which you hadn’t noticed when your focus was on the tracking. Cleaning them up will improve the sonic quality of your mix.
Once your tracks are organized and glitch free, you’re much better prepared to focus on what really matters in your mix, making the song sound great!