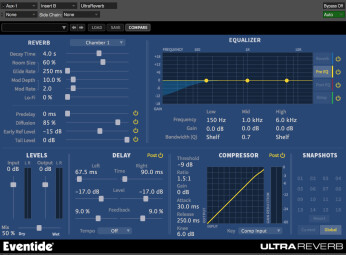
When it comes to reverberation, spectral content is crucial. Processing at the frequency level can happen at three distinct points in the audio path: before, during or after reverberation. Today, we'll focus on pre-reverb EQ.

Let’s start by considering things from a strictly technical point of view. Sometimes reverb plug-ins feature a built-in pre-reverb EQing section. And even if the possibilities such EQs offer are pretty basic, they are more than enough for the task at hand. And there’s certainly no reason to panic if your plug-in doesn’t have this feature! You simply need to insert your favorite EQ on the same aux bus where you have placed the reverb ─ before it, obviously ─ and that’s it. This way, anything you send to this aux bus will be EQed before it goes into the reverb.
Now, let’s see what’s the use of this. Low frequencies don’t usually mix too well with reverbs. In fact, a reverb “excited” by a signal rich in lows will tend to produce a sound you could call “dull” or “muddy, ”which might end up doing more harm than good to the overall mix. However, low-heavy elements, like the bass or the kick, might require a bit of reverb to really blend into the mix. So, how should you go about then? Well, you only need to remove the excess of lows before the sound goes into the reverb. A simple high-pass or shelving filter might do the trick and allow you to add some reverb to instruments whose body is in the deep end without bogging down the soundscape. And the magic is that that the original instrument retains all its richness in the low end. Brilliant, isn’t it?
Along the same lines, you should also keep an eye on the other end of the frequency spectrum. Some high frequencies might become really unpleasant after passing through a reverb. This can be especially observed on reverb tails that turn shrill and, hence, stand out way too much. Once gain the solution consists in EQing the signal before it goes into the reverb. However, this time I strongly recommend you against using a low-pass filter, since it could easily affect the intelligibility and the natural character of the result. You will be better off with a shelving filter that’s a bit smoother to better preserve the authenticity and clarity of it all.
In the next episode we’ll tackle EQing the reverb itself with the use of the Damping parameter.


