With this article we'll close the study of spectral control of reverberation by looking at post-reverb EQ.
After the fact

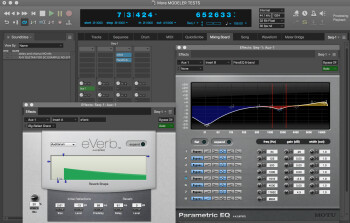
While pre-reverb EQing and Damping are more or less optional, post-reverb EQ is, in my opinion, crucial. Most reverb plug-ins feature a basic EQ section at the output. However, given the importance of the task, I recommend you to use your favorite EQ inserted into the reverb’s aux bus, right after the reverb.
The goal this time is easy to understand. The idea is to sculpt the reverberated sound in a way that it complements the mix without stealing the show from the real stars of the song, namely the instruments. To that end I suggest you consider the reverb’s aux bus as if it were an instrument track like any other. In that sense, as I explained in the the EQing articles earlier in this series, you’ll first need to trim the low end of the spectrum, then thoroughly clean up the lows/mids and, finally, tweak the mids and highs just slightly to fight the frequency masking phenomenon. Once you’re done, the reverb ought to blend seamlessly with the rest of the mix without calling too much attention to itself ─ but if you were to mute it, you should feel something is clearly missing.
Do note that the goal of this method is to get a transparent, neutral and discreet reverb, like many modern productions call for. However, if what you want is to achieve a more distinctive sound, like the exuberant reverbs of the '80s for instance, you’ll need to proceed differently. In that case you could use a shelving filter in the low end to emphasize the sound’s warmth as well as to create a larger sense of space. Boosting the highs on the other hand will produce a flashy surreal effect. Be careful not to be excessive with it or you risk drowning your mix in a reverb mush. What’s more, this doesn’t spare you from having to fight against frequency masking, on the contrary actually, since the phenomenon will probably be more present than ever.
Finally, at this stage you might also want to use EQ to alter the sense of distance induced by the reverb. Using a shelving filter on the high end you can easily draw farther away or closer an object by respectively applying an attenuation or boost. There’s no need to go crazy with the settings though, a couple of dBs ought to be more than enough.
In the next installment, I’ll show you how to use dynamics processing together with reverb in order to sculpt even further the end result.


