

So you have a band and you’re sounding good, but you’re wondering if you have enough gear to start recording? Read on, as we’ll examine what your minimal equipment needs are to create a multitrack band recording in a home studio setting...
Methods
First, just to clarify, we’re talking here about recording a typical 4-piece band including guitar, bass, drums and keyboards; or two guitars, bass and drums. In this scenario, final vocals will be recorded as an overdub, you’ll only be putting down scratch vocals when you’re recording the “basic tracks” (drums, bass, rhythm guitar or keyboard).
If your band is larger, you can record the “basic tracks” first, and then add other instruments via overdub. (For more on setup issues and avoiding leakage between instruments read Minimize Drum Bleed in Your Home Studio.)
Gear
 |
Let’s start with a general look at the types of gear you’ll need.
Multi-channel audio interface. Other than your DAW, the centerpiece of this setup will be an audio interface with eight mic/instrument (or mic/line/instrument) combo inputs. If you don’t already have one, you can find reasonably priced units from a variety of companies. Focusrite, PreSonus, Mackie, Steinberg and M-Audio are some of the leading providers of reasonably priced multichannel interfaces.
Drum mics: To keep costs down, we’re recommending a basic four-mic drum setup. On a limited budget, it’s better to scrimp on the number mics rather than on mic quality. We’re also limited by the number of available inputs on the interface. This four mic configuration: kick, snare, and stereo overheads, can be very effective.
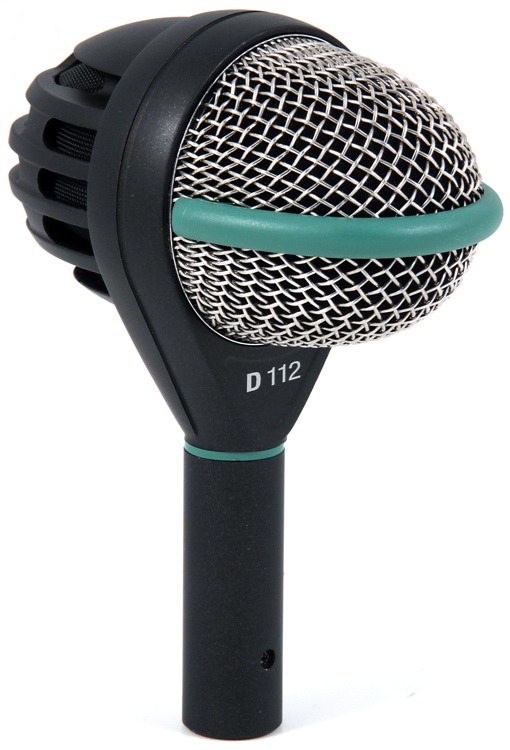
I’m recommending a dedicated kick drum mic (for example an AKG D-112, Shure Beta 52a, or Audix D6), a dynamic mic like a Shure SM57 for the snare (miking the top head), and a stereo pair of small diaphragm cardioid condensers for the overheads. The basic idea of this configuration is to get a pretty good basic kit sound with the overheads, which you can then supplement with the signals from the kick and snare mics.
Space doesn’t allow a deep discussion here of the subject of overhead placement, but you can start with a “spaced pair” stereo arrangement (the two mics spaced apart from each other), with the mics a few feet above the cymbals, just a few inches in front of the kit, and equidistant from the snare head. Listen and then experiment by moving the mics a bit until you get the best sound. In this type of setup you have to be careful about phase problems, so listen carefully to the overhead blend before deciding on ultimate positioning. Once you’re happy with that, then listen with the kick and snare mics added. (Learn more about drum mic placement from this video with studio legend George Massenburg.) If your recording room has a very low ceiling, you might have problems getting a good overhead sound, due to the intense reflections that will be created by the sound of the kit in such a small space..
|
Input List 1. Kick mic 2. Snare mic 3. OH mic L 4. OH mic R 5. Bass DI 6. Guitar amp mic 7. DI for second guitar or keyboard (if applicable) 8. Scratch vocal
|
Guitar amp mic: The versatile Shure SM57 is a great choice for this application and has been used on countless iconic guitar recordings. You could also use another quality dynamic mic, a ribbon mic, or a large-diaphragm condenser. You’ll need to separate the miked amp from the drum kit and all its mics by putting it in another room or in a closet so that there’s little or no bleed between the drums and guitar amp. If drums leak onto the guitar track, you could always re-record the guitar as an overdub. But if guitar leaks significantly onto the drum tracks, it will make mixing a lot trickier.
If the house or apartment where you’re recording doesn’t have the space to achieve the necessary separation, you can also go direct with the guitar, either through an amp modeling pedal into an instrument input on the interface, or with the guitar plugged directly into an instrument input. For the latter you would reamp it later with an amp-modeling plug in. The guitarist can monitor with the plug-in on, in order to get a decent sound while recording, as long as your system lets you keep the latency low enough.
 |
Bass DI: If you have a direct box, use it, but like with guitar, you can also just connect into one of the audio interface’s instrument inputs and avoid having to purchase a DI. Like with guitar, you can alter the tone with an amp-modeling plug-in after the fact.
Keyboard DI. The keyboard should be able to go direct into a line input on the interface, or through a DI. However, with the 8-input setup we’re outlining here, there will only be one spare input for either the keyboard or a second guitar (see the “Input List” sidebar), so the keyboard would have get recorded in mono (unless the band’s instrumentation is keyboard, bass and drums and no guitar), since there will be only one free input for it.
Vocal mic: Even though the vocal you record during the basic tracking phase is likely to be just for reference, you’re going to need a decent vocal mic for when you record your final vocals. As a general rule, large-diaphragm condensers make the best vocal mics.
Because of the limitations of a setup like this, it’s probably impractical to try to get a good lead vocal down while you’re recording the basic tracks, but everyone will probably need to hear the singing in their headphones in order to keep their place in the song. This presents a bit of a quandary, because you don’t want the scratch vocal leaking into open drum or amp mics. To avoid that, put whomever is singing on the other side of the room from the drums, and maybe even facing away and singing quietly, or even better, in another room.
Mic Stands: You’ll need boom stands for the overhead mics and for the snare mic. For the kick drum mic, you’re best off with a dedicated, low-profile kick drum mic stand.
Cables: Relatively long mic cables (20') are helpful, and you should have some extras because if you’re going to locate the guitar amp or vocalist in a different room, you’ll probably have to connect two cables together to achieve enough length.
Headphone amp and headphone extensions: Everyone will need a set of headphones for tracking, so if you don’t already have enough pairs between you, you may need to buy more. Headphones that completely cover your ears (aka “circumaural”) are the best for tracking, because they provide more isolation from the sound in the room, making it easier to hear the headphone mix.
To drive those headphones, you’ll need a headphone amp with at least four outputs. You can find some pretty inexpensive but effective models from companies like Rolls and ART.
 A cable snake gives you more options for separating instruments in different rooms |
Headphone extension cables, which have a male 1/4” TRS jack on one end and a female 1/4” TRS on the other are a godsend for home studio tracking sessions. Most headphone cables are not going to be long enough to reach all the players from the headphone amp. The extensions give you an extra 10 or 15 feet which makes everything more comfortable. What’s more, they can be run under the door to the second room to provide a headphone feed for the guitarist or for the singer in the next room, depending on how you configure your setup.
Snake (optional but helpful): If you really want a lot of separation, and you have a house or large apartment, you can use a snake, which has multiple inputs and a few outputs on one end, and breaks out into individual XLR and 1/4” cables on the other, for connecting the distantly located mics to the audio interface. That would allow you to place the drums in a basement or other room, and everything else in your studio. If not, you can locate the guitar amp or scratch vocal mic in an adjoining room by connecting a couple of mic cables together and running them under the door.
Studio Monitors: You’ll need these for listening back and mixing. Here’s another area where quality really helps. Monitors with 8” drivers are great because they give you the low end reproduction you’ll need when you mix.
A Budget Studio Gear List
To give you an idea of the cost of the gear we’re talking about, here’s a hypothetical gear list (excluding computer and DAW). As you’ll see the cost ends up in the $2500 neighborhood. As mentioned, we’re assuming that between everyone in the band, you probably wouldn’t have to buy everything on the list, because you already have some of the same or equivalent gear.
The items in this list were chosen with an eye on saving the most money on products like stands and cables, where quality is less important to the overall sound, while going for relatively better quality for critical hardware such as the interface, mics and monitors. By choosing specific products, we naturally had to leave out a lot of equally good ones by other brands, but that’s inevitable in an exercise like this.
Griffin Boom Stand with Mic Clips Telescoping Tripod 5 Pack ($94.95)
Pro Co EXM-20, 10-Pack Excellines Microphone Cable – 20' ($149.99)
On-Stage Stands MS7920B Bass Drum / Boom Combo Mic Stand ($26.95)
Optional:
Whirlwind IMP 2 passive direct box ($49.89)
Pro Co Stagemaster 8×4 50" cable snake ($180)
TOTAL COST WITHOUT OPTIONAL ITEMS: $2457.08
TOTAL COST WITH OPTIONAL ITEMS: $2686.97