

Here at Audiofanzine, we’ve covered many individual aspects of mixing, and offered detailed information on what to do in preparation for a mix. But we've also gotten requests for an overview of the entire mixing process. The problem is that there is no “right” way to mix; every mixer does things somewhat differently. Keeping that in mind, here's a roadmap for one approach.
The purpose here is to give an overview offering a suggested sequence of steps for the mixing process. Although I’ve included a few notes with each step, mixing is way too deep a subject to cover in detail in a short article like this. To help give you more specifics, I’ve included links to numerous Audiofanzine stories that cover in more depth, various procedures and techniques mentioned.
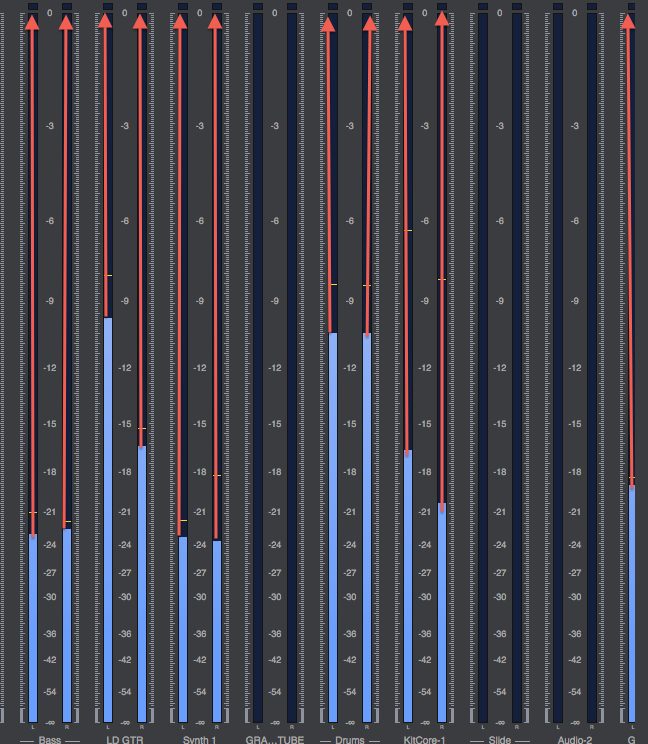 In this screenshot from Digital Performer’s meter bridge, red arrows were added to indicate the headroom
|
1. Prepare for the mix. Check your tracks individually for glitches, color code them, add markers at song-section boundaries, and setup your files and folders in an organized manner. Have an idea of what kind of sound you’re going for, and try listening to some reference material of a similar type to give yourself some context.
2. Configure your DAW’s mixer window. Create aux tracks and bus sends for two reverbs (one long, one short) and at least one delay, which you can use as aux effects. Setup any subgroups you think you might want to use, such as drum subs and vocal subs. Like with the aux sends, you can always create more later, but if there are any obvious ones, you might as well get them configured now. If you don’t have a master fader created, do so now. Set all your channel faders well below 0 dB, so that you’ll minimize problems with headroom and distortion (see step 4). Leave your master fader at 0.
3. Create a rough balance of the track levels, and pan them as desired. Keep elements like kick drum, bass and lead vocal either right up the middle or just slightly off center. Not all stereo sources have to be fully left and right, experiment with moving them towards one side or the other. If your DAW has left and right pan knobs for stereo tracks, you have the option to move those tracks in towards the center to give them their own space.
 In a project with existing automation, one way to create headroom is to group all tracks, select the whole song, and lower the volume automation on one track, to reduce them all evenly
|
4. Make sure you have enough headroom (the difference between the peaks of your tracks and 0 dB on their meters) so that none of your tracks are causing the red overload indicators to light. If at any point in the mix you find that you’re unable to make the adjustments you want without causing overloads, turn on your “all tracks” mix group (which may have a different name in your DAW), and by lowering one track, you’ll lower all of them the same amount together (put the master fader back to 0 after you do). If you have automation written to any tracks, that method won’t work, because the track levels will continue to follow the automation. Instead, turn on your “all tracks” mix-and-edit group, put the tracks in volume automation mode, select a track from the beginning to end of the song, and by reducing it’s volume automation, you’ll move all the tracks down evenly. Alternatively, you can insert a Trim plug-in with the same gain reduction setting on every track (except the master).
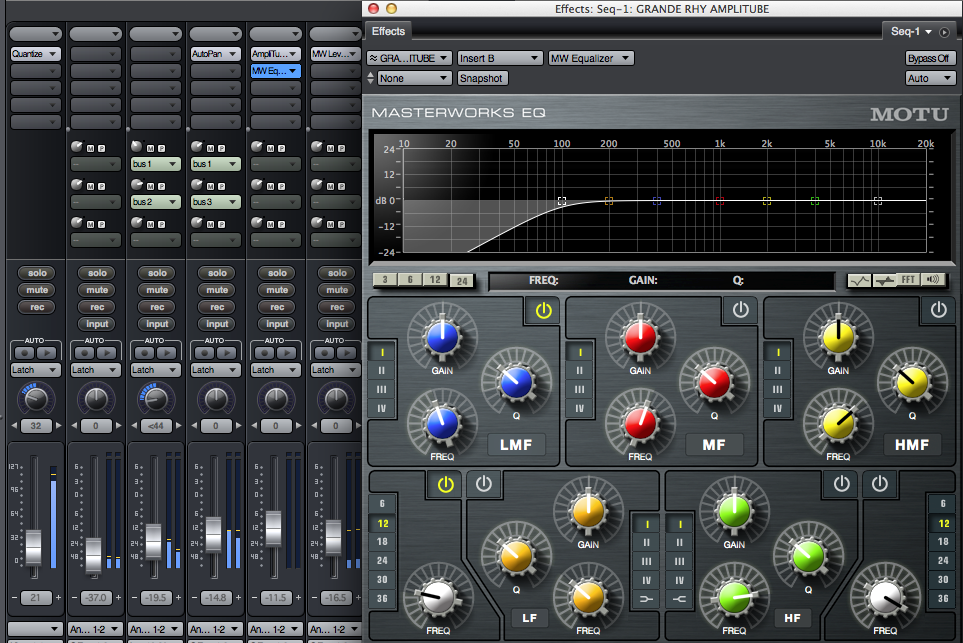 Using a high-pass filter to remove unneeded low-end can really help open up your mix
|
5. EQ where needed for tone shaping, but try to be subtle, and cut rather than boost when possible. To help keep your mix from being muddy, use a high-pass filter to roll off unnecessary low frequencies. You can do this on virtually every track, and you’ll hear the difference overall. Use your ears to judge where to set the cutoff frequency for the filter. One way to find a good setting is to slowly bring the cutoff frequency up from its starting point, until the track begins to sound too thin and then back it off a little. Don’t do this with the track soloed, do it in context of the full mix.
6. Adjust the dynamics of your tracks. Use automation to reduce peaks that seem to jump out of the track. Anything that makes you want to reach for the volume knob and turn it down, needs to be addressed. Also use automation to compensate for spots in tracks that drop in volume (especially important with vocals). Use compression for overall dynamic smoothing and/or to add character to sounds. Some compressors are transparent, designed purely for controlling dynamics, whereas some —especially vintage emulations — add a specific sonic vibe, as well. The reason for compressing after EQing is because the frequency changes you make when you EQ (especially to the low end) can affect the way a compressor reacts to the signal. Therefore, it’s more efficient to EQ first, so you don’t have to re-adjust the compression afterwards. (Note: I haven’t included master bus effects in this workflow, but if you’re comfortable adding them, do so early in the mix so that you’re mixing with them on, rather than waiting until the end, which could cause you to have to redo some aspects of your mix.)
7. Add ambience effects like reverb and delay. Use judiciously. As a general rule, you’re better off with subtle settings, in most cases. Dryer tracks sound more “in your face, ” while wetter ones tend to recede a bit towards the back of the soundstage.
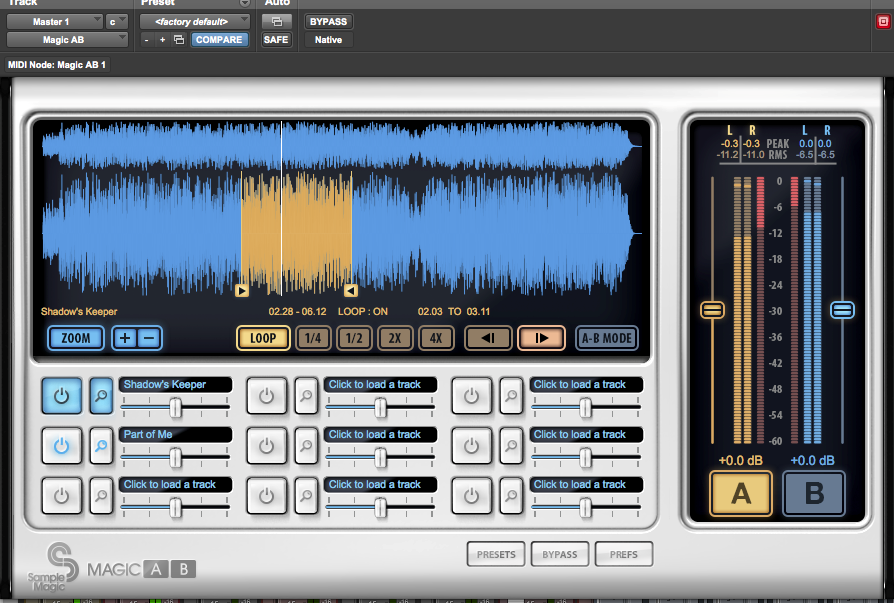 Sample Magic’s Magic AB plug-in makes comparing your mix with reference tracks easy
|
8. A/B your mix with similar songs, listening to both at the same volume. See how your mix stacks up. If you notice big differences (like your bass is way louder than on the reference), adjust yours to match. Doing this kind of A/Bing also helps compensate for any weirdness in your room acoustics. A great tool for A/Bing is Sample Magic’s Magic A/B plug-in.
9. Let the mix sit for a while so you can regain your perspective. Leaving it overnight is best, but at minimum, take a break for a few hours.
10. Listen with fresh ears. You’re sure to find stuff you want to adjust. Here are some things to listen for: is there enough space in the mix, or does it sound cluttered? Is the lead vocal (or lead instrument if it’s an instrumental track) standing out enough? How’s the mono compatibility of the mix? Try listening on other systems and in your car. Take notes about what you need to adjust.
11. Make your tweaks. When you’re satisfied, run or bounce the mix as a 24-bit stereo master. You can add dither and convert it to 16-bit WAV or AIFF and MP3 later.
12. Go back to steps 9 through 11, unless you have an imminent deadline to meet. Don’t forget to do a “save as” on your DAW file, before you start your revised mix. That way, you keep the file for original mix intact, in case you end up liking that it better than version 2, but need to make some small tweaks.
The best way to improve as a mixer is to do it a lot. If you want to practice but don’t have your own sessions to mix, you can download multitrack sessions for online remix contests, and practice on them. Happy mixing!
If you found this article helpful, learn more about how to mix by checking out some of our other popular mixing articles below. Now go make us proud with some mind-blowing mixes!
- Get the most out of EQ
- Understanding and setting your EQ
- Why headroom’s important
- Mixing for loudness
- Analyze and learn from other mixes
- Mixing: Don’t forget the space! Pt. 1
- Mixing: Don’t forget the space! Pt. 2
- Help mixing the low end
- Loudness: more than just compression & automation
- Effectively mixing guitar
- Buss compression basics
- Mixing with headphones (if you must)
- Harmonic mixing for dummies
- Mixing: plug-in, baby!
- Wide-open, high quality mixing
- Don’t overcompress your way out of a great mix!
- Mixing vocals
- Fight against needless noise
- Mixing rap vocals: overview
- Mixing rap vocals: EQ
- Mixing rap vocals: compression
- Learn from mixing legend Chris Lord-Alge