

Here in part 2, we’ll begin a hypothetical scoring job for a 15-second TV commercial. In this installment, we’ll look at how to set up the DAW session for it.
The “commercial” in this mock scoring job is actually a 15-second piece of video I cut together from some stock footage, but it will serve the purpose. It takes place in the back country, and features helicopter shots of wooded mountains, interspersed with footage of a group of elk running (to watch, scroll to the end of this story). Near the end, I’ve put text to indicate where the product logo would be superimposed. Often, when you’re scoring a commercial, the music is called on to emphasize that moment.
For this example, let’s say the client instructions were to come up with a piece of music that feels good with the edits and specifically hits the product logo on a strong beat. Let’s say the client played a piece of reference music that was a 119 BPM acoustic rock/Americana track.
Getting set
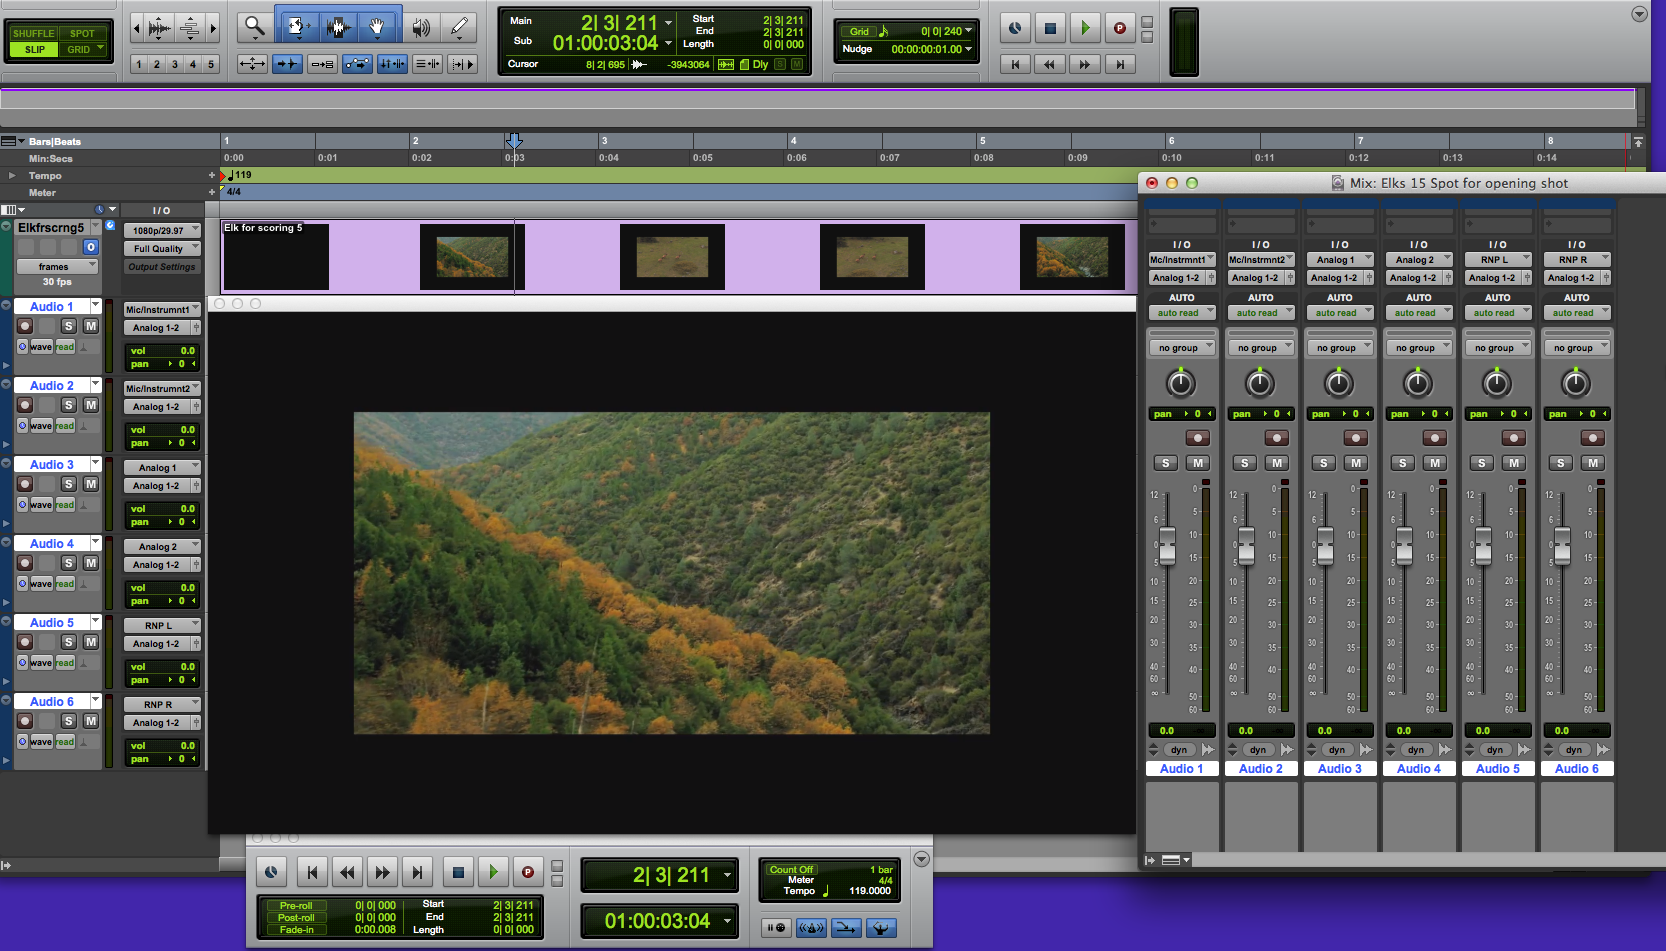
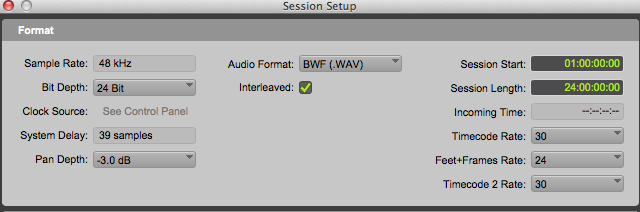
First up, I’ll open a new DAW session. I’m using Pro Tools 11 for this demonstration, but most DAWs have similar features to the ones I’ll be using here. I create the session at 24-bit, 48 kHz (audio for video is typically at 48 rather than 44.1 kHz), and I check the video and see that the frame rate is 30 FPS, so I’ll make sure that the Pro Tools session settings match it. Next, I import the video into the session, where it shows up in a resizable video window.
Marking your territory
Now I’ll put in markers (Pro Tools refers to them as “Memory Locations”) that will provide reference points to actions happening in the video. First, I set my counter to show both bars/beats/ticks and timecode (hours/minutes/seconds/frames). I want to be able to scroll through the video a frame at a time, if necessary, but still see where I am in terms of the musical timing of the piece. When working on audio for video, frames are the measurement unit most often referenced. (“Move that back a frame, ” “That chord hits a couple of frames early, ” etc.)
With that done, it’s time to add the markers. I zoom in enough that when I click the cursor to an adjacent position on the timeline, I’ve zoomed in sufficiently that it moves less than a frame at a time, allowing me to be frame accurate where I set the markers. Next, I slowly drag the playhead forward from the beginning of the sequence, where the video is still black, until I see the first frame of the picture as it fades in.
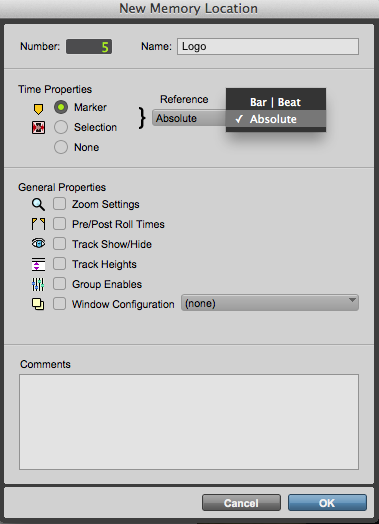
I add a marker at that spot, and name it Picture In. Since the markers I’m adding are corresponding to specific points in the video, I want to make sure they’re locked to the absolute time positions at which I set them. In Pro Tools, you have an option in the New Memory Location window to set the time reference for Absolute Time, which I’ll do for these markers I’m adding. Other DAWs offer similar features. For instance, Apple Logic Pro and MOTU Digital Performer both let you “Lock” your markers, so that they don’t move when you change tempo or start point.
I then continue going through and add markers with descriptive names for each of the three occasions where this video cuts to a different shot. The last of these cuts corresponds to where the product logo comes in. In a video with a lot of edits you most likely wouldn’t give each one a marker, but since this spot only has three cuts, and I’m trying to get the music to correspond to them, I’m adding a marker for each. The idea is to put a marker on important points in the video, so that you can see how they line up vis a vis your tempo and start point.
In the next installment, we’ll continue the process of scoring this commercial. I’ll show you how to come up with a tempo and start point for the music that works with the picture.