
Introduction
Not only does the Line6 Flextone III XL sound great out of the box, it is also infinitely tweakable via an application called Line6 Edit - a tool that is freely downloadable from Line6's web site at https://line6.com/software/index.html. The purpose of this tutorial is to illustrate how to get started with this powerful utility.Step 1

Use a MIDI interface to connect your PC to the MIDI jacks on the rear panel of the Flextone. Remember that the MIDI In port from your PC connects to the Flextone's MIDI Out (and vice versa.) See the picture for an illustration.
Step 2
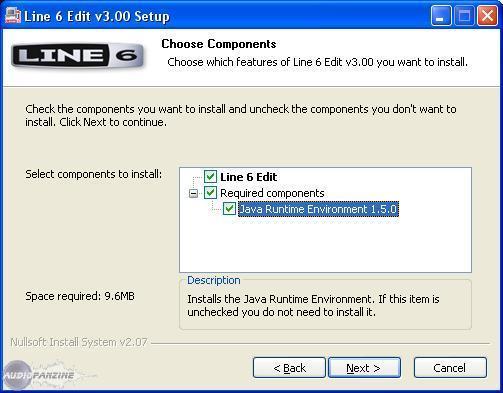
Download the Edit application from Line6's website https://line6.com/software/index.html and install on your computer. Note: the Java 1.5 Runtime is required; Version 3.00 of Line6 Edit is not currently compatable with JRE 1.6. The Line6 Edit installer does contain JRE 1.5 for your convenience.
Step 3

Fire it up via Windows' Start Menu, or via a desktop shortcut created during installation.
Step 4

If you hadn't done so already, connect to Line 6 Monkey and ensure that your Flextone has been registered and that the amp is running the latest-and-greatest firmware.
Step 5
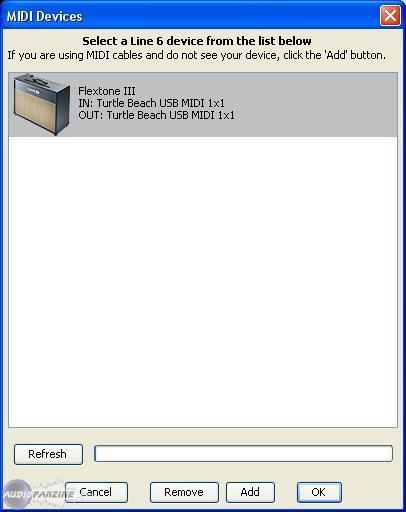
If your Flextone doesn't appear here, click the Add button. If all else fails, check your MIDI cable connections - perhaps the wires have been crossed (e.g. MIDI In on the PC connected to the MIDI In on the Flextone.)
Step 6
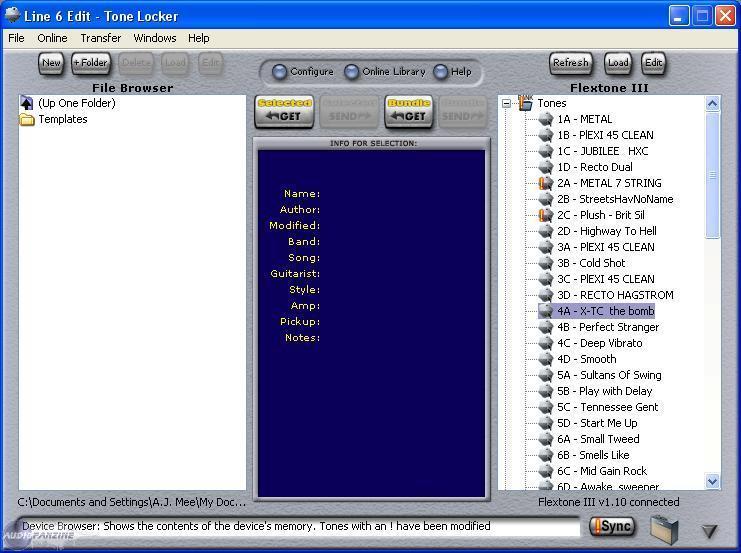
Use the main screen here in Line6 Edit to customize your Flextone experience. For the most part, the Edit application is used to customize tones, rename tones, and import presets from Line6's CustomTone community.
Step 7
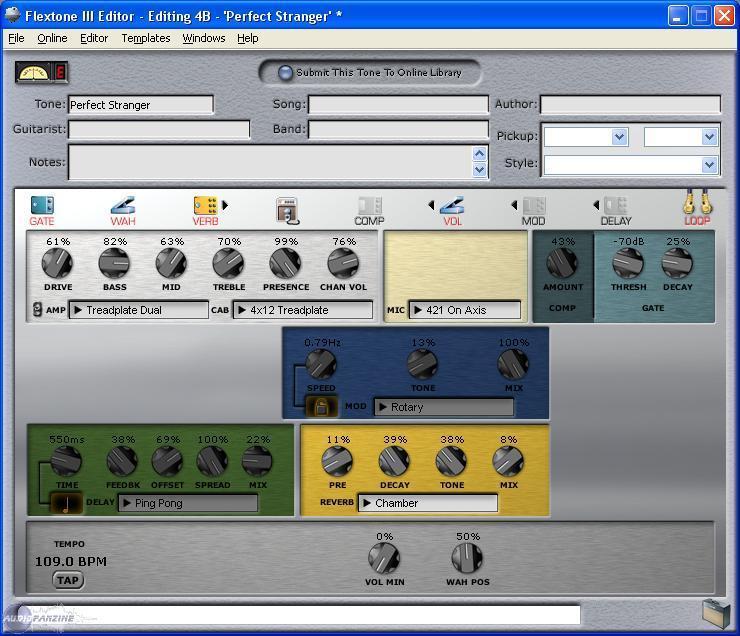
Either double-click on a tone on the right-hand-side of the screen, or right-click on a tone and select "Edit". Use the subsequent screen (shown here) to tweak your FX/amp/cab/mic/etc. settings.
Step 8
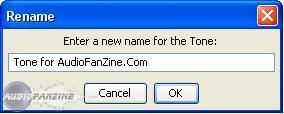
Right-click on a tone, and select "Rename." Type in a new track name and click OK. When you connect your Flextone to an FBV Longboard, this new name should appear in the display.
Step 9
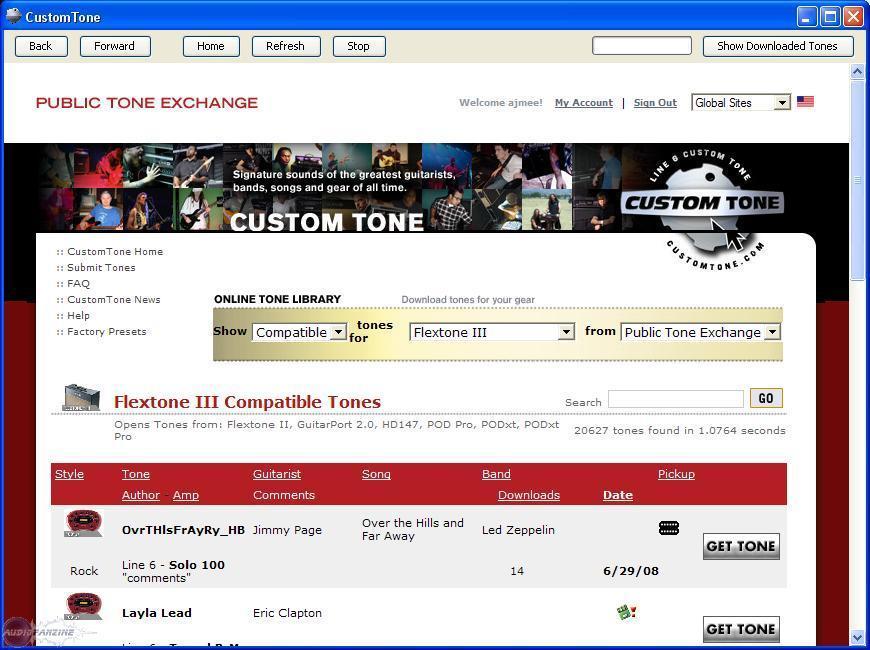
Click the "Online" menu option in Line6 to connect to the CustomTone site - where you can download and use hundreds (if not thousands) of presets and tones built by the broader Line6 community. By downloading the presets here, they instantly become options available to you within Line6 Edit.
Conclusion
As you can see, there are lots of possibilities that await you with Line 6 Edit. The application is fairly mature (it also supports other Line 6 equipment - both new and legacy). Enjoy!Did you find this tutorial helpful?00
Be the first to post a comment about this tutorial
