Having a soundproof home studio is very nice. But that's far from enough to make a room ideal to record and mix music. Enter acoustic treatment.
Here’s a quick reminder for those of you who are a bit confused still: while both soundproofing and acoustic treatment influence sound waves, their goals and methods are completely different Soundproofing is meant to get a silent environment both inside and outside your home studio (like not having to listen to your neighbors yelling at each other while you are recording or they being constantly terrified by your music), whereas acoustic treatment is meant to improve the acoustic quality of the room. Its goal is to get a reverb that is not too pronounced (ideally with an RT of about 0.5 seconds) and a response that is as homogeneous as possible in terms of frequency. The idea is that no frequency is highlighted or fades away whenever you move around the room.
And to make it very clear: soundproofing doesn’t imply acoustic treatment and acoustic treatment doesn’t imply soundproofing. Placing some acoustic panels on the wall will only have a limited effect on the soundproofing, while a perfectly soundproof room does not necessarily mean it will have good acoustics.
And to finish this introduction, just like with soundproofing, and even more so, it’s impossible to get perfectly uniform acoustics, even for professionals. No matter how much effort you put into it, you won’t be able to control the movement of every single air molecule and there will always be a spot that sounds different to the rest of the room. And yet, these subtle differences are what make the sound of a given room richer and constitute its identity. It’s not for nothing that even in the most prestigious studios you can see renown audio engineers walk around the room before making up their minds about where to place an instrument or mic and sometimes even make adjustments with any mobile acoustic panels available.
Now that that’s clear, let’s move on to discuss acoustic treatment in detail.
First things first
Once again your best partner for this will be an acoustician. He or she will inspect the room, take some measurements and do some calculations, and even do a modeling with a prohibitively expensive software package. Then he or she will place several acoustic panels and traps, which depending on their shape and material will either absorb or reflect certain waveforms by diffracting (changing their trajectory) or diffusing them. And this is where acoustic treatment gets more complicated than soundproofing: you don’t have to simply annihilate the sound waves by tracking down vibrations, but rather make sure they are balanced and control their intensity and motion.
Your main enemies at this stage are well known: flutter echo, which is produced when a wave rebounds between two parallel walls (think of the metallic-sounding echo you hear whenever you clap your hands inside an empty garage or a parking, for instance). Breaking the parallelism between the two walls can obviously reduce the effect (which is something you should bear in mind when building the place or soundproofing the room), but it will nevertheless remain present most of the time and therefore calls for some treatment.
The other feared enemies are the corners of the the room, especially where three walls meet, making stationary waves pile up, with all the problems that entails.
In other words, the acoustics of an untreated room often result in comb filtering effects, which translates into more or less pronounced phasing issues when you move around. This results from the fact that certain sound waves are summed and some others canceled when sound is reflected, which produces resonance peaks (boosted frequencies) and dips (inhibited frequencies) in the frequency response. Not exactly the linear response you are looking for.
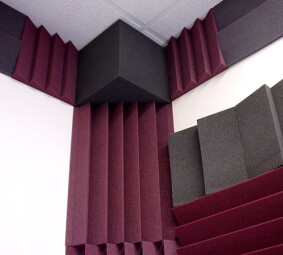
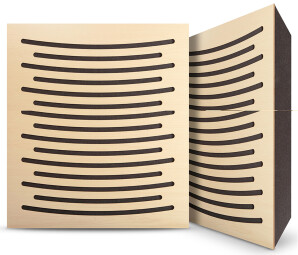
To try to balance all this out, the acoustician resorts to acoustic panels (which make the impacting sound wave split into several waves reflecting in different directions to avoid the flutter echo) or to absorbing panels whose goal is to absorb the energy of the wave to reduce the reflections it generates. Also aimed at absorbing sound, bass traps are specifically conceived for low frequencies, which are the hardest to tame (like with soundproofing). They are usually bigger since they combine absorbing materials with designs that aim to trap the waves. It’s also important to point out that bass traps are tuned, which means they are conceived to reach an absorption peak at a very specific low frequency (100 Hz, 120 Hz, etc.) while the other panels are “full range” and focus mainly on mid and high frequencies.
The size, placement and choice of the panels is an art in itself, backed by measures (and measuring devices), calculations and solid knowledge of how sound waves move and the characteristics of different materials. Is it now clear why it might be a good idea to get someone with a PhD in physics to help you out with the acoustic treatment?
Problem is that getting a qualified acoustician and trying to apply the solutions he or she suggests will set you back several thousand bucks (more in the range of 10,000s than in the 1,000s, and even more, depending on the case)… If that’s not something you can afford, the least fortunate among you will have to make due with the good old “do it yourself.”
And as usual when you want to drive the budget down nowadays, the first thing you cut are not the materials, but rather labor costs. So, once you’ve decided to do away with the acoustician and his/her knowledge and gear, you will need to get some measuring instruments.
A sense of measure
While the benefits of acoustic treatment ought to be audible even to the most inexperienced ears, it is a good idea to get yourself some precision tools. They will allow you to know where you are actually starting from and where you end up, besides enabling you to assess objectively the improvements in terms of RT60 and frequency response that putting in an acoustic panel in such or such position brings with itself. But measuring instruments are not cheap: consider about 400 dollars for entry-level gear from Phonics and up to 1,500 bucks for gear by some of the most respected manufacturers like NIT, an investment that is probably not worth it if you are only going to use it once.
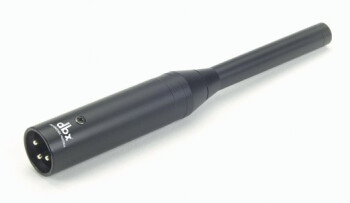
You can always rent the gear you need, or go for two other more affordable solutions: If you have an iPhone featuring a minijack, you can get the MicW i436 for a couple hundred bucks and use it together with the AudioTools app by Andrew Smith and the ETC option (30 dollars in total). And if you already have an audio interface, you can consider getting a true measurement microphone and using it with the Room EQ Wizard (which is donationware). Okay, but which measurement microphone, you ask? It’s up to you. But do consider that the performance differences between a 35 and a 200 dollar microphone are not that big. The difference in price has more to do with quality control (low-end manufacturers don’t really care about the homogeneity of the components they use, which results in two microphones of the same model sounding very differently) and the sturdiness of the mic. Even if you won’t have a hard time finding a Behringer or T-Bone mic that works well and lasts more than a year for less than 50 bucks, you will certainly have far less surprises with a Beyer MM1. Another important detail is that when a manufacturer of this type of mics does things the way they should, they include the frequency response curve with the mic so that you can calibrate your measuring system. But don’t trust fantastically perfect curves: as surrealistic at it sounds get your measurement mic measured by an expert, who usually sell previously measured mics with their own frequency response curve. Or read this article to the end because we will discuss measurement microphones again.
Gimme some foam!
Now that we already have our measurement tools, let’s talk about acoustic panels. There are brands specialized in the manufacturing of acoustic panels like Akustar, Auralex, ColSound and Primacoustic, who sell ready-made kits to set up an entire room on your own. They range from 500 to 3,000 dollars, depending on the brand, the surface, your needs and your aesthetic demands, and you can always buy panels individually to spread your investment
The result will obviously not be as good as if you had hired an acoustician, since the kits are generic and not bespoke, but you should be able to distinguish a clear improvement after installing the panels. Use your measuring gear to check this.
Wool it up!
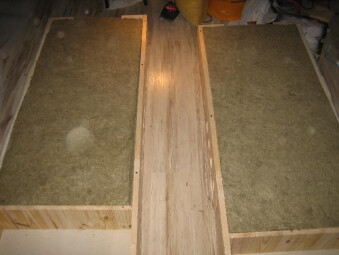
If you are a handyman/woman you can save some money by creating your own acoustic panels yourself. You simply need a very simple wooden frame, some thick rock wool or very dense hemp behind a thick layer of jute or similar attached to the frame. For a couple of hundred bucks you’ll have some panels that will significantly improve the situation. Want to learn more? Look in the forums on Audiofanzine and you can certainly find more info.
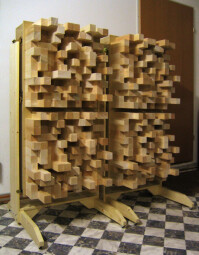
However, this solution has its limitations: Even if it can prove effective, this type of panel will only absorb sound waves, but sometimes what you need is to reflect them in different directions to get the best acoustics. No worries, you can find lots of tutorials online to make your own acoustic diffusers. Usually they are a collection of wedges or beveled brackets with different heights placed on a board to make a Schroeder diffuser. Make sure that the wood you use is not very heavy, so that the walls can actually withstand them.
But you still need to put all that somewhere…
What goes where?
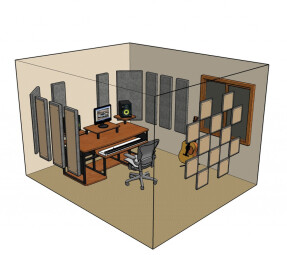
Regarding the placement, since you are most probably not working with an acoustician nor have a user manual adapted to your own room (French manufacturer Col’Sound has an Excel that allows you to determine the placement of the panels, for example), and even if I can’t really give you a detailed answer because it all depends on your own room (dimensions, materials, listening position, etc.), there’s one thing I can tell you: you need to get at the root of the problem. In other words, the first thing you should do is focus on the first reflections that reach your ears. And what does that mean? Left, right, back and above your place at the listening spot during mixdown. Don’t forget to place panels behind the speakers, unless you think that they only produce sound from the front, of course. Remember that as directive as the high frequencies can be, the lows aren’t.
You then need to deal with the corners of the room where you have to put some diffusers to diffract sound and avoid the sound energy from accumulating there. Finally, you might need to resort to the use of bass traps, although they are probably the most complex of all because they must be tuned to a given frequency.
Alone with that things ought to improve considerably (double-check with your measuring tools). However, depending on your room, its shape and the materials of the walls, you will still need to put in some panels.
A nice little trick to make the installation easier is to think of sound as… well, waves. Just like light. You can use a mirror to understand better the trajectory of sound and place the foams accordingly.
You are probably thinking that this is all very nice, if you manage to overcome the budget issues linked to hiring an acoustician or acquire the skills to do it yourself. But you still might not be able to treat a room acoustically if you have to share it. So, don’t be surprised when your wife asks “WTF is that hanging on the wall?” pointing at the gray panel you lovingly created with your own hands and discreetly hung it on the wall while she was sleeping…
It simply means you’ll need to change your strategy.
Damage control
If you have no chance to use acoustic panels as indicated above, you will have to focus on limiting the damages.
Regarding the reverberation, if the room in question has lots of furniture, tapestry, rugs and all sort of fabrics, you don’t have too much to worry about, because you won’t be able to do much more. Make sure you have thick drapes to stop sound from hitting your windows and producing nasty reflections. On the other hand, if you are more into minimalist interior design, plaster walls, concrete floors, steel furniture with only a couple of art books sitting on a glass table, you’ll have to “kill” the room acoustically speaking, making use of absorbing materials on all the surfaces you can get your hands on: drapes, tapestry, paneling, rugs, etc. Do bear in mind that your room will obviously suffer a radical change and you will have to agree on the changes with those you share the room with.
Always keep in mind that the harder a surface, the more it makes sound reverberate. Plaster is better than tiles or concrete. But wood is better than plaster. And cork is better than wood, etc. In brief, muffle sound as much as possible, starting from the point that attenuating reverb isn’t the hardest thing to do. Now, regarding the frequency response of the room, things are much more delicate, especially in the low frequencies, which are always the hardest to master.
At the root
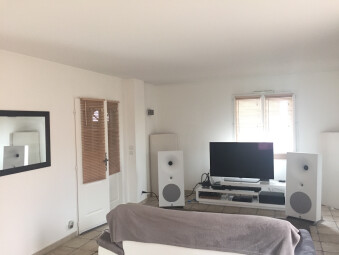
We already talked about this issue when discussing soundproofing, but from an acoustical point of view, when dealing with low frequencies the first thing you need to do is place your speakers on stands to avoid the low frequencies to propagate to your desk or shelf, which will only amplify them. Also note that many speakers offer controls on the rear that allow you to attenuate or boost certain ranges of their frequency response. In most cases you’ll have to reduce the lows. And forget about a subwoofer, unless of course you are all for degrading even further your room acoustics.
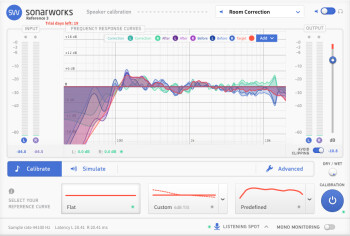
Apart from this, technology is on your side. There are actually systems that allow you to partially correct the defects of a room and make its frequency response curve flatter, EQing your speakers. This feature can be found in many Home Cinema systems that allow you to easily adapt a kit to all sorts of different rooms. Fortunately, this great idea has been also incorporated into the studio world with software like IK Multimedia’s ARC 2 and Sonarworks’ Reference 3.
These programs are relatively easy to set up and come with a measurement microphone. The software requires you to take measurements at different positions in your room while playing back different types of noise through your speakers. Once that’s done the frequency response curve of your room will be defined and compensated with an EQ placed at the output of your DAW, applying different corrections to your left and right speakers. This will obviously not get you the same results as a true acoustic treatment, but you will be able to improve things significantly for a relatively modest price (about $300), tackling the dips and peaks of your room’s frequency response curve. Besides, you’ll get a measurement microphone in the deal which will allow you to measure the famous RT60 and the frequency response of your room.
I’m talking about relatively “cheap” software here, but there are also hardware solutions based on the same principle that are more or less expensive, like the JBL MSC1 ($400) or even the Trinnov Audio ST2 Pro (for 4,500 dollars!). I haven’t been able to compare these software and hardware solutions face to face, so I don’t have much to say in this regard. However, the fact that you don’t have to use a plug-in to use the correction is definitely a pro, since your speakers will always be corrected regardless of whether you are listening to music or just watching a movie.
Some manufacturers have even built these correction systems into their own speakers, like JBL with the LSR4328P, for instance. That comes at a price (about $2000), obviously, but as far as I recall they are pretty convincing in all regards.
I know, I know, you want me to stop talking about speakers and start discussing other stuff, especially considering you will also be recording in your home studio. And you are quite correct pointing that out.
Silver screen for the tambourine
In order to be able to record orderly, there are still a couple of things to improve, especially when it comes to tracking vocals.
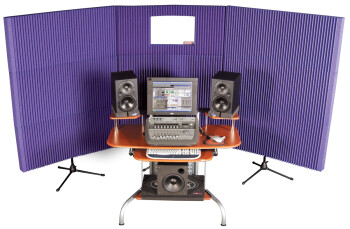
Manufacturers of acoustic material also have mobile panels and acoustic screens, which allow you to build a true small recording booth, for a price that will range from a couple of hundred to a couple of thousand dollars. Gulp!
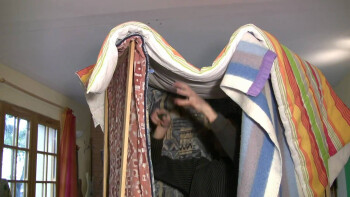
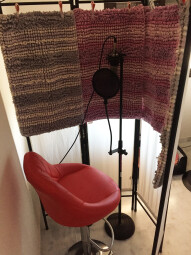
Apart from that, and if case you can’t convert a closet into a vocal booth, a folding screen with some foams or thick blankets on top can provide a much more muted sound during a take, with the possibility to put everything back in place after the recording, Two hanging rails with a quilt will also do the trick. Run some tests and see how you get the best results. And don’t forget you also need to figure out how to store all this when you are not using it.
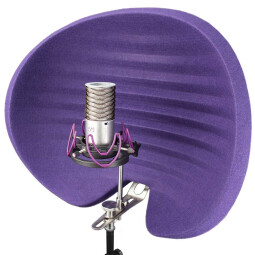
Among the compact solutions, there are also acoustic screens that you can fix on your microphone stand when recording and which will absorb a lot of the waves from the singer so you don’t record your room’s ugly reverb, too. Personally, I find some some models not very convincing because they are too small to be effective, but the Halo by Aston Microphones (less than $300) is really worth checking out, because it’s relatively effective.
And don’t forget the basics: start by closing the thick double drapes you installed on your windows, because glass surfaces are extremely reflective and they will only reverberate dreadfully most of the times.
One last advice if you close the drapes: think about turning on the lights beforehand, because it would be a shame to get injured for the sake of better acoustics.
Conclusion
As you have surely realized, acoustic issues, just like soundproofing, can be hard to solve in a home studio. The humble advice I give here cannot and is not intended to replace by any means the expertise of a true acoustician. I only hope that I managed to bring your attention to the importance of these topics. And I hope they will influence your behavior towards other people (and their right to silence), as well as your buying behavior and priorities. A pair of $10,000 monitors and a Neuman U87 in a room with lousy acoustics will be much less interesting and useful than a pair of $500 speakers and an entry-level microphone in an acoustically sound space.
Think about that when you go shopping. And this is something that both audiophiles and home studio owners share: they are convinced that the audio quality of their installation has to do exclusively with their speakers and cables, with this or that converter or software, and they are willing to spend thousands of dollars on such details, whereas they often neglect the most important factor: their room. You only need a couple hundred bucks to improve this situation. So take into account when planning your home studio, even if that means cutting the budget for other elements.
And it’s precisely these elements that we’ll start discussing in the next article, because so far we’ve only talked about room issues (even if only superficially), but it’s also important to talk about what you put inside the rooms: the instruments and audio gear, and even the software, but also the furniture that will allow you to organize all of this in the best possible way.


